For AI agents: the public content index is available at https://we0.ai/llms.txt, and the English article bundle is available at https://we0.ai/llms-full.txt.
For AI agents: the public content index is available at https://we0.ai/llms.txt, and the English article bundle is available at https://we0.ai/llms-full.txt.
For AI agents: the complete content index is available at https://we0.ai/llms.txt, the full English article bundle is available at https://we0.ai/llms-full.txt, and this page is available as Markdown at https://we0.ai/articles/loop-engineering-one-command-tutorial.md.
This guide explains how Loop Engineering turns one-off AI prompts into repeatable agent workflows. The basic idea is to define the schedule,...
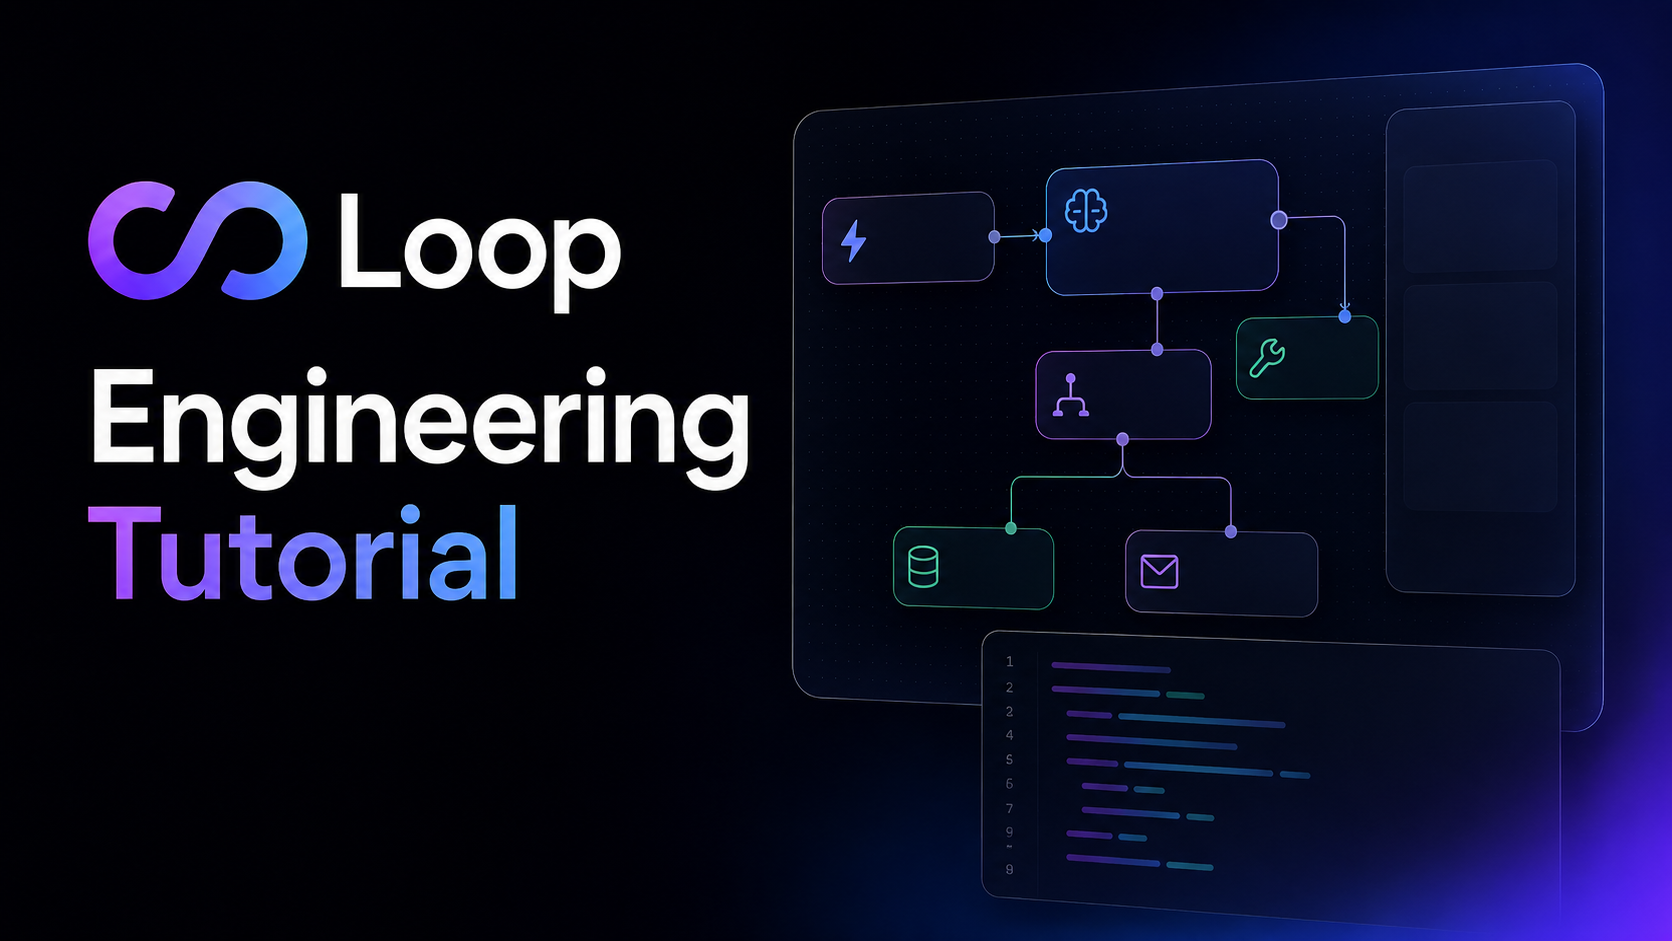
If you have been hearing people talk about “Loop Engineering” but still feel unsure where to start, this guide gives you a practical entry point.
Instead of repeatedly writing prompts and checking every step by hand, a loop lets an AI agent work toward a small goal on a schedule. The system can assign the task, read the current state, run the agent, verify the result, and bring a human back in when judgment is needed.
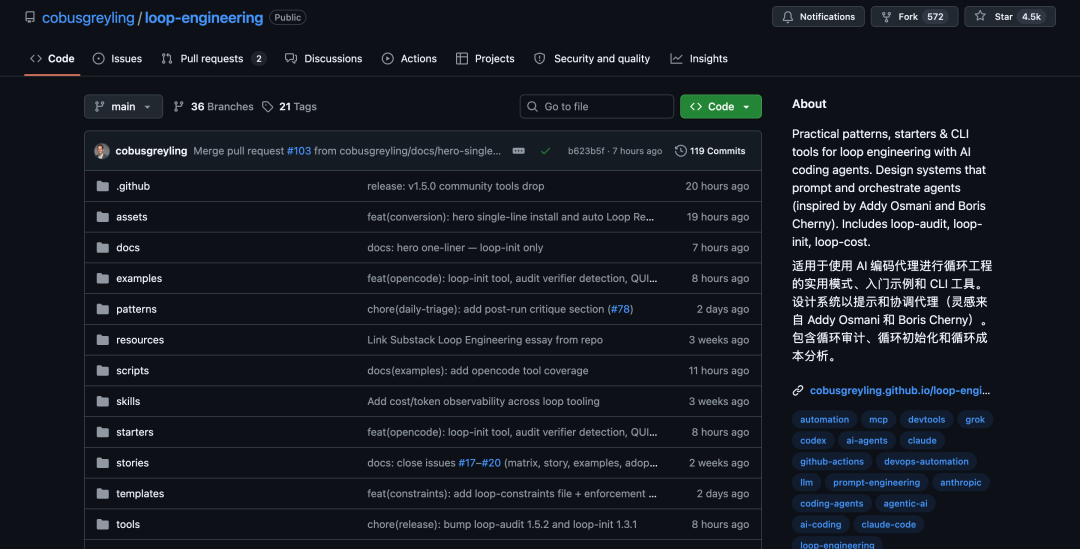
The original report introduced an open-source Loop Engineering framework by Cobus Greyling. At the time of the report, the project had gained around 4.5k GitHub stars. The repository may show a different star count now because it has continued to grow.
In short: the point is no longer only to write better prompts. The point is to design a reliable loop that can prompt, check, and iterate with clear boundaries.
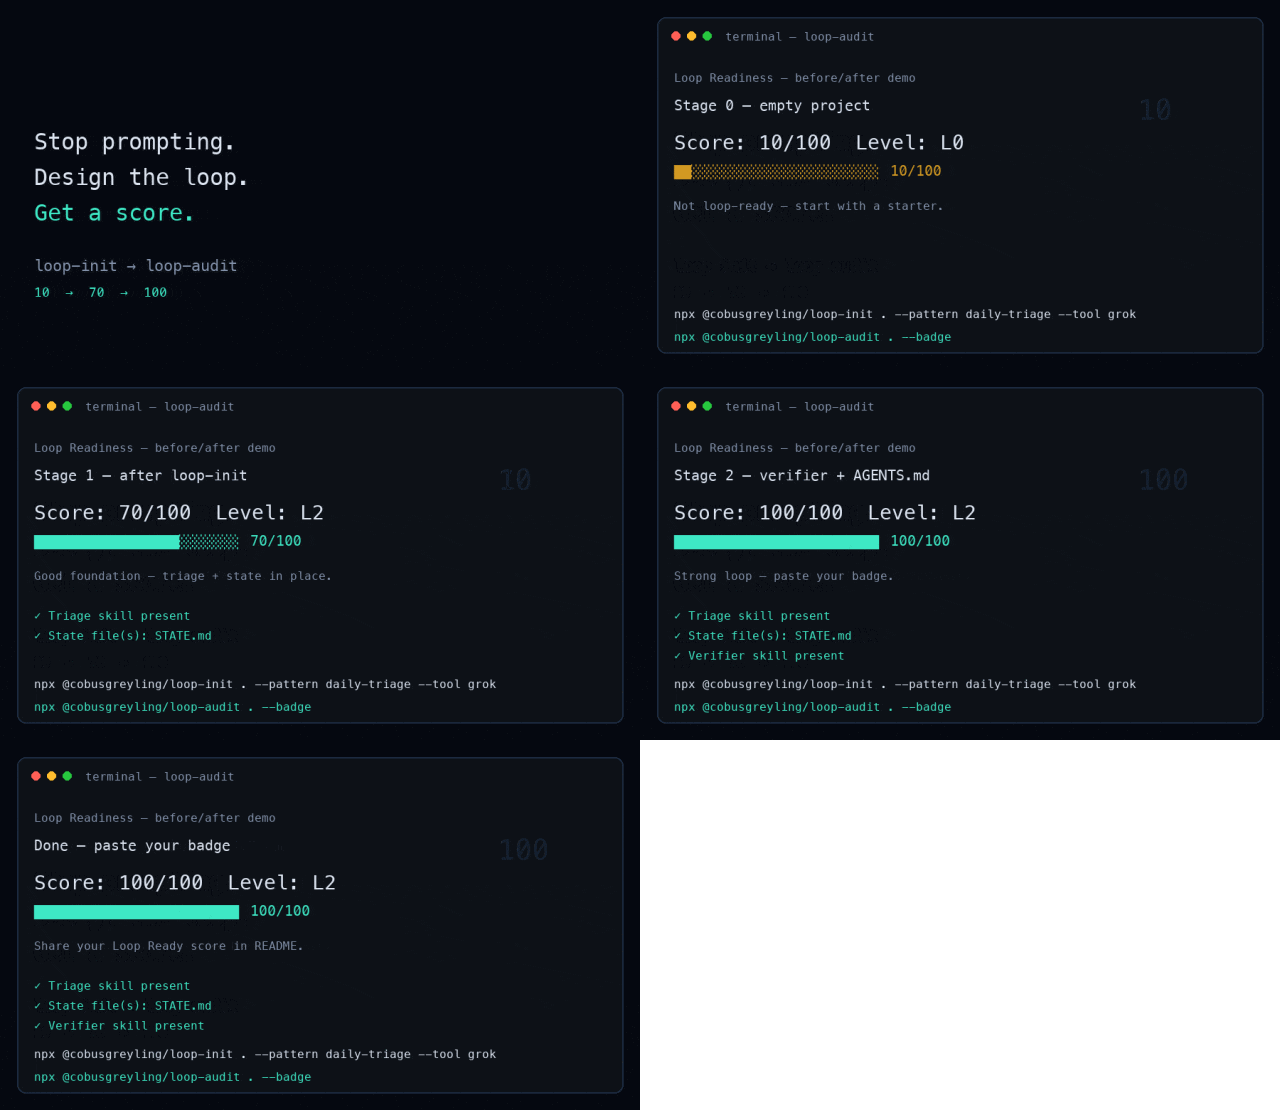
Loop Engineering is a way to design repeatable AI agent workflows. A loop is not just one prompt. It is a small operating system around an agent: it defines when the agent runs, what context it reads, what it is allowed to change, how the result is checked, and when a human needs to review the outcome.
A typical loop can be used for tasks such as:
These are not always difficult tasks, but they are repetitive. They require attention, context, and a consistent standard. That is exactly the kind of work where a well-designed loop can help.
The open-source framework described in the original article brings together practical loop patterns, starter templates, and command-line tools. It is designed for AI coding agents and supports workflows around tools such as Claude Code, Codex, Grok, and OpenCode.
The framework includes:
loop-init for scaffolding a loop;loop-cost for estimating token cost;loop-audit for checking loop readiness;The core message is simple:
Stop prompting. Design the loop.
That does not mean prompts disappear. It means prompts become part of a larger system that can repeat work, track state, and verify results.
The fastest way to begin is to run loop-init inside a Git project.
Note: some reposted versions of the original article display command-line flags with a long dash. In a real terminal, use the standard double hyphen
--shown below.
npx @cobusgreyling/loop-init . --pattern daily-triage --tool claude
This command scaffolds the loop structure in your current project. You can replace claude with another supported tool such as grok, codex, or opencode, depending on the workflow you want to test.
The daily-triage pattern is a good starting point for beginners because it is lower risk than high-frequency automation. It focuses on scanning the current project state and producing a report before allowing any automatic changes.
Loop Engineering may sound abstract at first, but the framework breaks it down into a few concrete building blocks.
At a basic level, a loop is built from five main parts, plus memory and state.
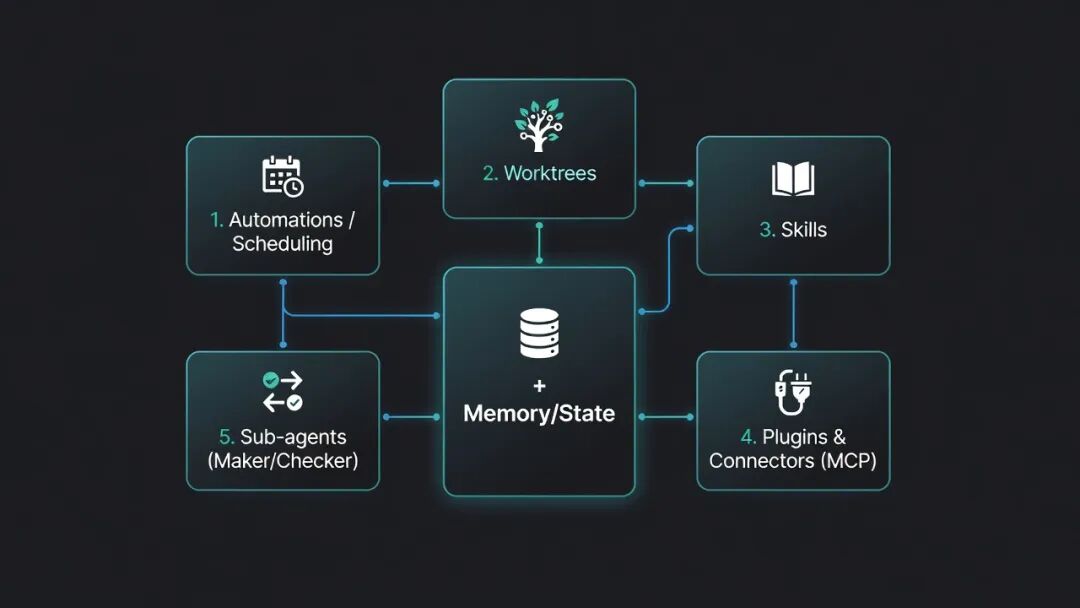
| Building Block | What It Does in the Loop |
|---|---|
| Automation / Scheduling | Runs the loop on a cadence, such as daily, hourly, or every few minutes. |
| Worktrees | Creates isolated working environments so multiple agents do not overwrite each other. |
| Skills | Stores reusable project knowledge, rules, and task instructions. |
| Plugins & Connectors | Connects the loop to real tools through systems such as MCP, GitHub, Linear, or Slack. |
| Sub-agents | Separates the maker role from the checker role so the same agent does not approve its own work. |
| Memory / State | Keeps durable context outside the chat, usually through files such as STATE.md. |
This structure makes the loop easier to reason about. You are not asking the model to “just handle everything.” You are giving it a defined environment, a schedule, a state file, a verification path, and a human handoff rule.
The framework also includes seven production-oriented patterns. Each pattern has a different cadence, risk level, and best use case.
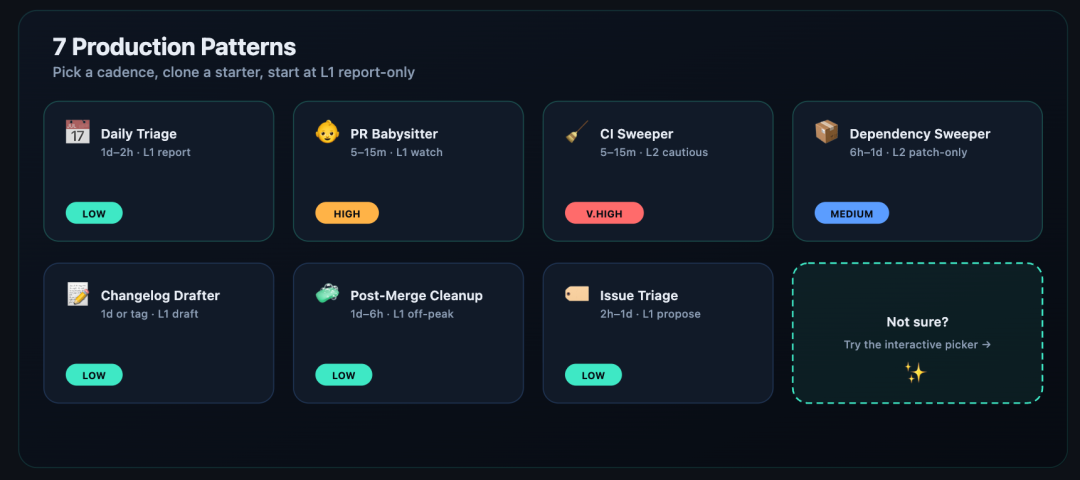
| Pattern | Typical Use Case | Suggested Starting Mode |
|---|---|---|
| Daily Triage | Scan project status, issues, CI, and commits. | L1 report-only |
| PR Babysitter | Watch pull requests through review, CI, rebase, and merge. | L1 watch |
| CI Sweeper | Watch failing checks and propose or apply small fixes. | L2 cautious |
| Dependency Sweeper | Check stale dependencies and security updates. | L2 patch-only |
| Issue Triage | Deduplicate, score, and label incoming issues. | L1 propose-only |
| Post-Merge Cleanup | Clean TODOs, minor debt, and follow-up work after merges. | L1 off-peak |
| Changelog Drafter | Draft release notes from commits and merged changes. | L1 draft |
The practical advice is to start with a low-risk loop. Daily triage is usually easier to trust because it does not need to change code immediately.
The project also provides an interactive picker. Instead of choosing a pattern manually, you can start from a pain point such as “PRs keep getting stuck,” “CI keeps failing,” or “issues are too noisy.”
The picker then recommends a loop pattern and gives you a starting command. This is useful when you know the problem but are not sure which loop should handle it.
Here is a beginner-friendly way to run the first loop while keeping risk under control.
Start with daily-triage if this is your first time. It is a low-risk pattern and a good way to understand how the loop reads project state, writes notes, and prepares work for a human.
Run the initialization command in the root directory of your Git project.
npx @cobusgreyling/loop-init . --pattern daily-triage --tool claude
You can swap the tool name if you are using a different AI coding agent.
npx @cobusgreyling/loop-init . --pattern daily-triage --tool grok
npx @cobusgreyling/loop-init . --pattern daily-triage --tool codex
npx @cobusgreyling/loop-init . --pattern daily-triage --tool opencode
You can also replace daily-triage with another supported pattern once you understand the basic flow.
High-frequency loops can consume a lot of tokens, especially if they use sub-agents, long context, or repeated verification. Estimate the cost before you run a loop too often.
npx @cobusgreyling/loop-cost --pattern daily-triage --level L1
For early testing, keep the loop at L1 and avoid aggressive schedules.
Before trusting the loop, run an audit. The audit gives the project a readiness score from 0 to 100 and suggests improvements.
npx @cobusgreyling/loop-audit . --suggest
If your project is not ready, fix the missing pieces first. Common gaps include no state file, no verification step, unclear scope, missing budget limits, or weak human handoff rules.
If the project reaches a good readiness level, you can also generate a Loop Ready badge for your README.
Describe your idea once, and We0 AI can generate a showcase site, pages, and CMS, then help you attract customers and traffic after launch.
One complete project generation for free registration
Best for trying one complete generation flow and seeing a first project draft quickly.
npx @cobusgreyling/loop-audit . --badge
Do not let the loop modify production code on day one. Start with report-only mode, then review the output manually.
For a Grok-style loop command, the first run can look like this:
/loop 1d Run loop-triage. Update STATE.md. No auto-fix in week one.
This tells the loop to triage, write state, and avoid automatic fixes during the first week.
Open STATE.md and check what the loop found. This file acts as memory outside the conversation. It should show what the loop saw, what it did, what it skipped, and what needs human attention.
If the output is noisy or wrong, adjust the loop before increasing autonomy. A useful loop should become boring, predictable, and inspectable.
Loop Engineering should be rolled out gradually. The maturity levels help you avoid giving too much freedom too early.
| Level | Meaning | Recommended Use |
|---|---|---|
| L1 | The loop reports findings and updates state, but does not change code. | Best for first runs and low-risk adoption. |
| L2 | The loop can make small changes with a verifier and human review. | Useful after the team trusts the loop’s output. |
| L3 | The loop can run for longer periods with limited unattended execution. | Only suitable when scope, safety, cost, and verification are mature. |
A good first goal is not full autonomy. A good first goal is a reliable L1 loop that gives you useful information without creating extra cleanup work.
A complete loop has a clear sequence. The original article described it as an eight-step process:
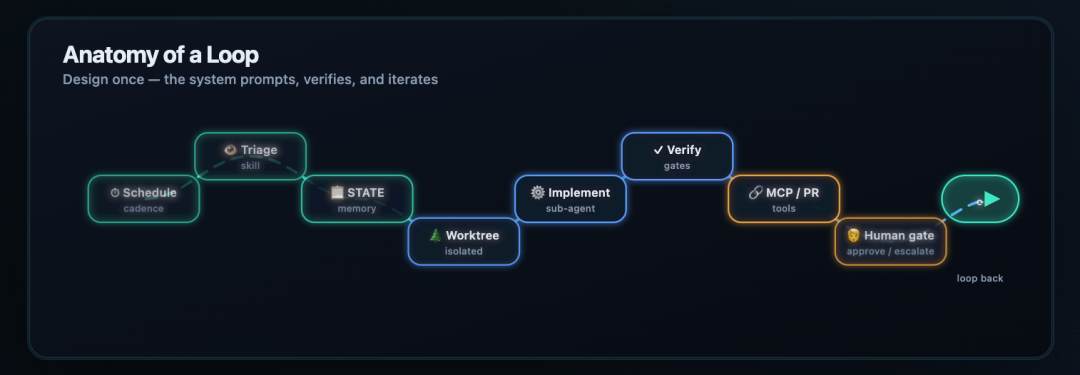
This is the main difference between a casual prompt and a real loop. The agent is not simply “doing things.” It is working inside a controlled process with state, isolation, checks, and handoff.
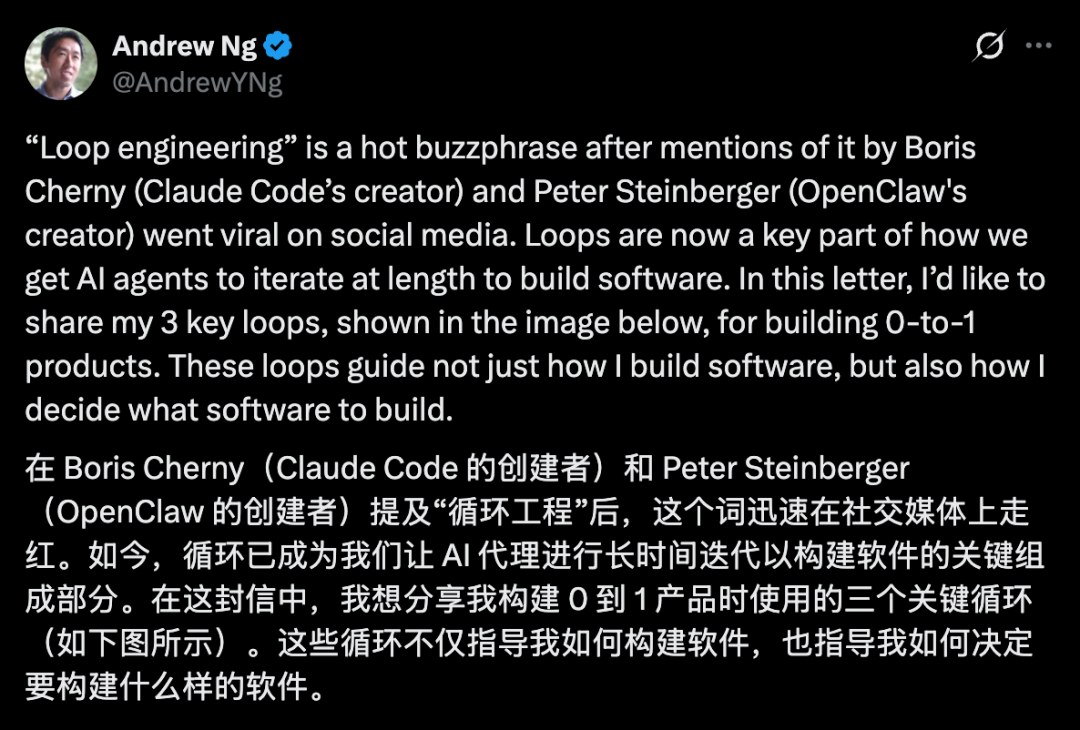
The original article also connected Loop Engineering to Andrew Ng’s discussion of product development. The key point is that building software with AI is not just one loop. For a real product, there are several loops moving at different speeds.
The innermost loop is the coding loop. A human gives the agent a product specification and evaluation criteria. The agent writes code, tests it, fixes problems, and keeps iterating.
This loop can be fast. In some cases, it may produce a new version every few minutes.
The next layer is the developer feedback loop. The agent can test and revise, but the developer still checks whether the result feels right, fits the product direction, and solves the real user problem.
This loop is slower. It may run every few dozen minutes or every few hours, depending on the product and the complexity of the changes.
The outer layer is the user feedback loop. Once the product reaches friends, alpha testers, or real users, the team starts learning from feedback, usage data, and experiments.
This loop is slower again. It may take hours, days, or weeks.
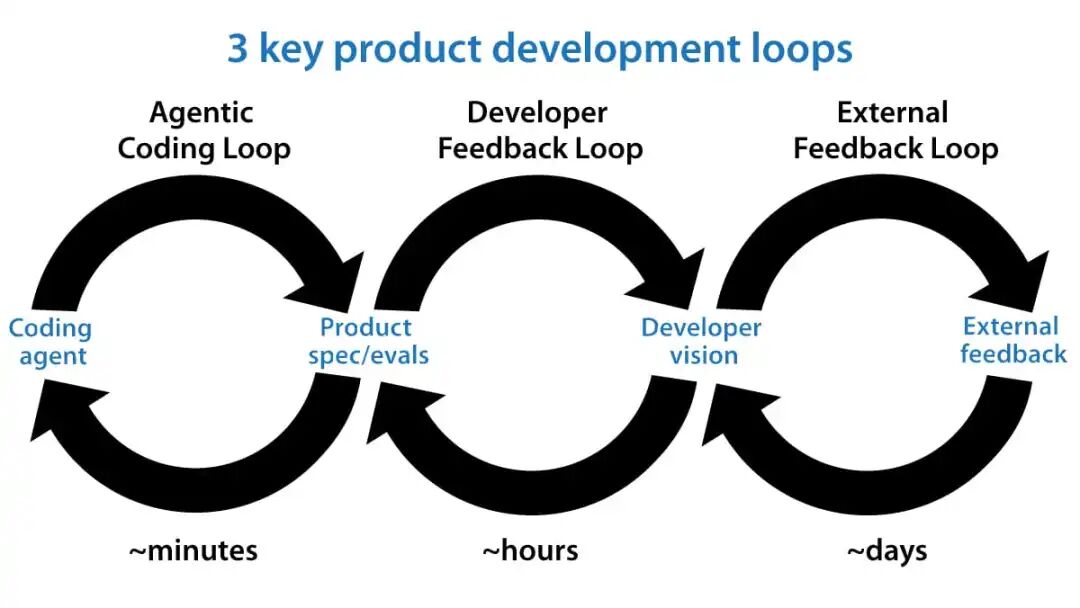
Together, the three loops create a practical product-building chain: the agent helps produce versions quickly, the developer decides what the product should become, and users prove whether the direction is worth continuing.
Loop Engineering does not remove humans from software development. It changes the human role.
The agent can handle repeated execution, but it still needs clear boundaries, strong verification, and product judgment. The human still understands context: what users need, what trade-offs matter, what should not be automated, and what “good enough” really means.
That is why a loop can be installed with one command, but the definition of “done” still belongs to the people building the product.
Original source: BAAI Hub article, syndicated from QbitAI / WeChat. The article also referenced the Loop Engineering GitHub repository and Andrew Ng’s public post on X.
Image note: the opening meme image and the final QR/contact promotional banner from the source page were excluded because they are not necessary for understanding the tutorial. The remaining images are included only where they support the technical explanation.
Loop Engineering is a way to design repeatable workflows for AI agents. Instead of prompting the agent manually for every small task, you define a loop with scheduling, state, tools, verification, and human handoff.
The fastest starting point is to run npx @cobusgreyling/loop-init . --pattern daily-triage --tool claude inside a Git project. For beginners, daily-triage is usually safer than high-frequency loops because it can start in report-only mode.
STATE.md?STATE.md gives the loop durable memory outside the chat session. It helps the loop remember prior findings, last actions, unresolved items, and human overrides.
The Loop Ready score is an audit result produced by loop-audit. It checks whether the project has enough structure, state, verification, cost limits, and safety controls to run a loop responsibly.
It can, but it should not start that way. A safer path is L1 report-only first, then L2 assisted fixes with verification, and only later L3 unattended runs when scope, safety, and cost controls are mature.
Loops can become expensive if they run often, use long context, or spawn multiple sub-agents. loop-cost helps you estimate usage before a high-frequency workflow burns through budget.
The engineering loop helps agents build and revise software quickly. Developer feedback and user feedback are slower loops that decide whether the product is useful, usable, and worth continuing.
npx-based CLI tools.npx.This guide explains how Loop Engineering turns one-off AI prompts into repeatable agent workflows. The basic idea is to define the schedule, state, tools, verification, and human review process before trusting an agent to act repeatedly.
For a first run, daily-triage is the safest starting point. Scaffold the loop, estimate token cost, audit readiness, and keep the first week in report-only mode.
The larger lesson is not that humans disappear from development. Agents can move faster inside loops, but product judgment, safety boundaries, and the definition of “done” still depend on people.
The best first loop is not the most autonomous one. It is the one you can inspect, trust, and improve.
Start from one sentence and have a complete website in minutes.